To Homework
IT 240 -- Homework H5
A Sports League Database
Due date: Wednesday, May 21, 2008
Reference: The Midwest League logo
Midwest League website

In this assignment we will visit the concept of a user interface that ties the objects in a database together, so that the database is easy to use.
The switchboard displays a menu, often a series of menus, which enables a nontechnical person to move easily from one Access object to another. Any database
containing a switchboard is known as an application and, unlike an ordinary Access database, it does not require knowledge of Microsoft Access on the part of
the user.
We'll also do a little with macros and prototypes, two techniques that are used by developers in creating applications. A macro automates common
sequences and further simplifies the system for the end user. Prototypes are used in conjunction with developing the various switchboards to demonstrate the
"look and feel" of an application, even before the application is complete.
Many of you have probably played in a sports league at one time or another (e.g., Little League, intramural league
at school or a league at work). All of this applies equally well whatever the league, fun, semi-pro, professional - there are teams, players, and coaches.
The typical league registers the players and coaches individually, then holds a draft
among the coaches to divide the players into teams according to ability.
The league may have been organized informally, with manual procedures for registering the participants and creating the teams. But we are going to automate the
process.
In addition to the tables (teams, players, coaches), the database will contain multiple forms, queries, and reports based on the tables. A Players form is
necessary in order to add a new player, or edit or delete the record of an existing player. A similar form should exist for Coaches. There might also be a
sophisticated main and subform combination for the Teams table that displays the players and coaches on each team, and through which data for any table (Team,
Player, Coach) can be added, edited, or deleted. And, of course, there will be a variety of reports and queries.
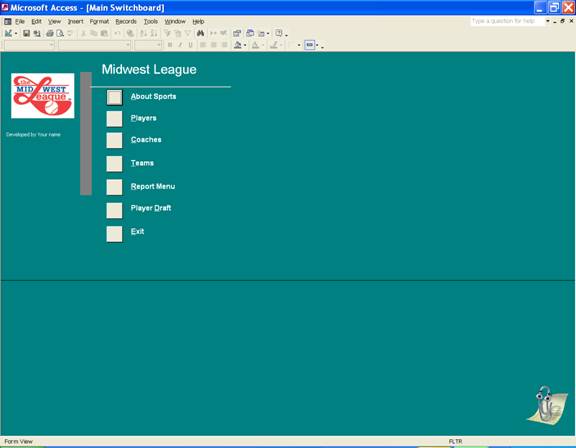
Here is the Main Switchboard that will be used for this application. (You won't need to implement the sixth button, Player Draft, for
this version.) The midwest sports logo was added, but the application, pretty
much, applies to any type of
sports league. An interface should be intuitive and easy to use. Click the About Sports button and the system displays the information screen. Click other
buttons and the indicated form displays or the Close Form button to return to the main menu.
Okay, after this introduction, let's get started.
Warning: From now, and until the end of the class, our
databases will contain Macros. I won't get into details here, but for the one or
two students that have been using Access 2007, I would highly recommend using
2003 from now on in this class.
- The Midwest Sports League Database
- Download the Midwest Sports League
database. Click the various buttons in the Database window to view the contents
of this database. This database contains the various objects (tables, forms,
queries, and reports) in the sports application.
- Pull down the File menu, click Database Properties, then click the Contents tab to see the contents of the database. The Database Properties command
enables you to see all of the objects on one screen.
- Click the other tabs in the Properties dialog box to see other information that is available. Close the Properties dialog box.
- Create the Switchboard
- Use the Switchboard Manager to create a Sports League switchboard. At this point, your
switchboard should include About League, and three buttons to Open Form in Edit Mode for the Players, Coaches, and Teams forms. The league logo is
given at the beginning of this document. Completely test your switchboard.
- Add Your Record
- Click on the Players button on the switchboard - this opens the Players form. Click the Add Player button.
- Click the text box to enter your first name. (The playerID is an AutoNumber field that is updated automatically.)
- Continue to enter the appropriate data for yourself, please assign yourself to the Bees team. The team is entered via a drop-down list. Type B and Bees
is entered automatically from the drop-down list for teams.
- The player rating is a required field (all players are evaluated for ability in order to balance the teams) and must be A, B, C, or D.
- Click the Close Form button to return to the switchboard.
- Complete the Data Entry
- Click the Coaches button (or use the Alt+C shortcut) to open the Coaches form. Click the Add Coach button. Click in the text box to enter the coach's
first name.
- I'm (Gary) the head coach for the Bees. So click the appropriate option button to make me a head coach. Assign me to the Bees team. Close the form.
- Click the Teams command button on the switchboard to open the Teams form and move to Team T02 (the Bees). You should see me as head coach and yourself
as a player. Close the form.
- Create the AutoExec Macro (Note: If you do the Extra Feature, see step 10, then skip this step)
- Click the Macro button in the Database window.
- Click the New button to create a new macro. Maximize the window.
- Click the drop-down arrow in the Action box to display the available macro actions. Scroll until you can select the Maximize action. (There are no arguments
for this action.)
- On the second action line select the OpenForm action. Then, in the Action Arguments pane, select Switchboard (the form you created in step 3 above).
- Click the Save button. Type AutoExec as the macro name and press OK.
- Click the Run button to run the macro and open the switchboard.
- Close the switchboard. Close the AutoExec macro.
- Create the Prototype Macro
- You should be back in the Database window, which should display the name of the AutoExec macro. Click the New button to create a second macro.
- Chose the MsgBox action.
- Click the text box for the Message argument, then press Shift+F2 to zoom so you can see your entire message as you type it. Enter this message:
The object will be implemented in the next version. In the meantime, you can gain an appreciation for the "look and feel" of the system by stepping
through the various commands on the switchboard.
- Click the text box for the Type argument, click the drop-down arrow to display the list of message types, select Information.
- Click the text box for the Title argument, and enter Under Development.
- Click the Run button to test the macro. (Name the macro Prototype.) Click OK.
- You should see a dialog box containing the message you just created. Click OK. Close the macro.
- Create the Close Database Macro
- Click the New button again to create this third macro. This macro will have three actions. Specify the MsgBox action as the first action.
- As the message, enter an appropriate message that stresses the importance of backup. Select Warning as the message type. Enter an appropriate title.
- Now create two Close actions, the first to close the switchboard and the second to close the database.
- Save the macro as Close Database.
- Create the Report Switchboard
- Run the Switchboard Manager to display it's dialog box.
- Click New. Enter Report Switchboard as the name of the switchboard page. Click OK.
- Select report Switchboard, click Edit to open the Edit Switchboard Page dialog box. Click New to open the Edit Switchboard Item dialog box.
- Add the first switchboard item. Text: Display Report Template Command: Open Report Report: Report Template.
- Click OK to create the switchboard item. The Edit Switchboard Item dialog box closes and Display Report Template appears on the Report Switchboard page.
- Add the Team Rosters as the next switchboard item. Specify the Run macro command and choose Prototype as the macro. Similarly, add additional buttons
for the Coaching List and Relationships Diagram. These two also run the Prototype macro.
- Add an additional item that will return the user to the main switchboard. Click New to open the Edit Switchboard Item dialog box. Click in the Text
list box and type "&Return to Main Menu..."
- In the Command list box the Go to Switchboard command should be entered. In the Switchboard list box, enter "Main Switchboard." Click OK to create
the switchboard item. Close the Edit Switchboard Page.
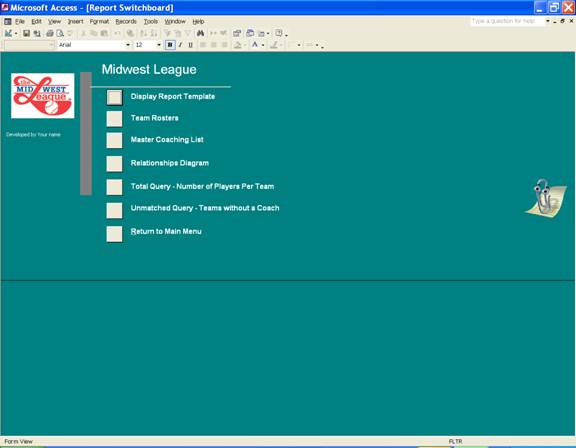
- Here's what the Report Switchboard looks like (except for the 5th and 6th buttons - those will be implemented in a future
version).
- Modify the Main Switchboard
- Add another item to the Main Switchboard, call it Report Menu. Pressing this button should open the Report Switchboard.
- The Main Switchboard needs a command to close the database, call it Exit.
In the Command list box type Run Macro. In the Macro list box, type Close Database. Click OK to create the switchboard item.
- The Main Switchboard should contain six items: About League, Players, Coaches, Teams, Report Menu, and Exit.
- Close the Edit Switchboard Page. Close the Switchboard Manager.
- Extra Feature
- Completely test both your Main Switchboard and your Report Switchboard - make sure all the macros are functioning properly.
Also, close your database and then re-open it to test that the AutoExec macro is
working properly. The design of the switchboards should be consistent with all other database objects.
- After you're sure everything is okay and just before you submit your database,
pull down the Tools menu, click the Database Utilities command, and Compact and Repair Database.
- Your database file must be called H5-Smith.mdb, where Smith is your last name.
Submit your H5-Smith.mdb file using COLweb.